
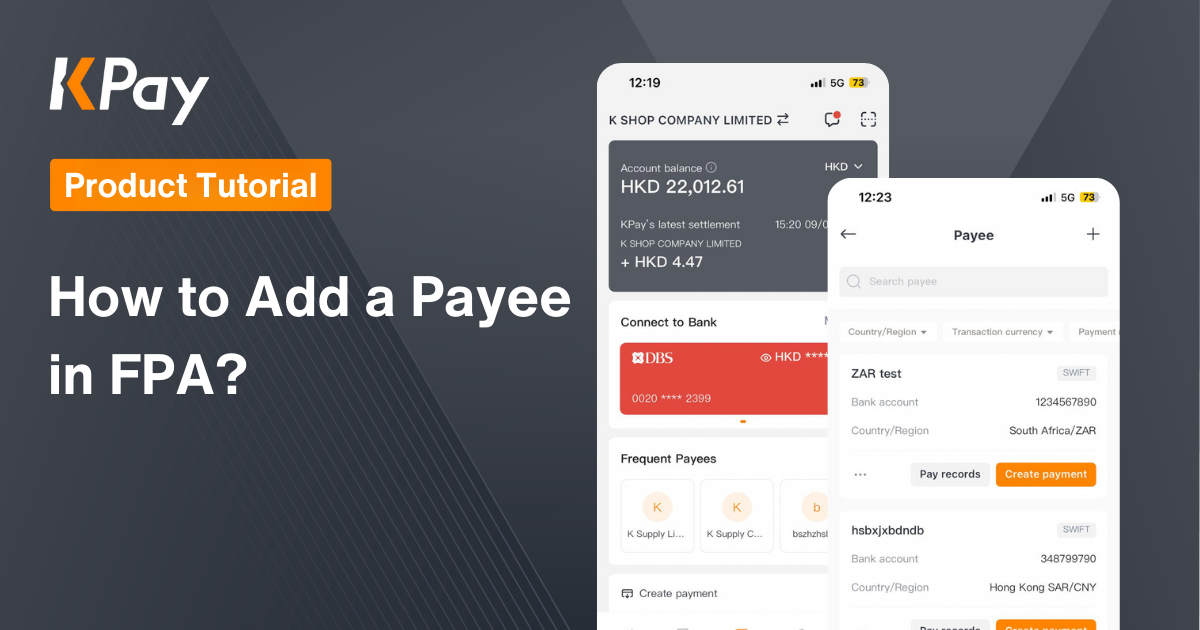
Introduction
The “Payee management” feature on the KPay platform allows users to efficiently add payees, manage transaction records, and select frequent payees, eliminating the need to re-enter details for each bill payment. This guide will show you how to create, manage, and edit payees, as well as export transaction records.
How to Add a Payee?
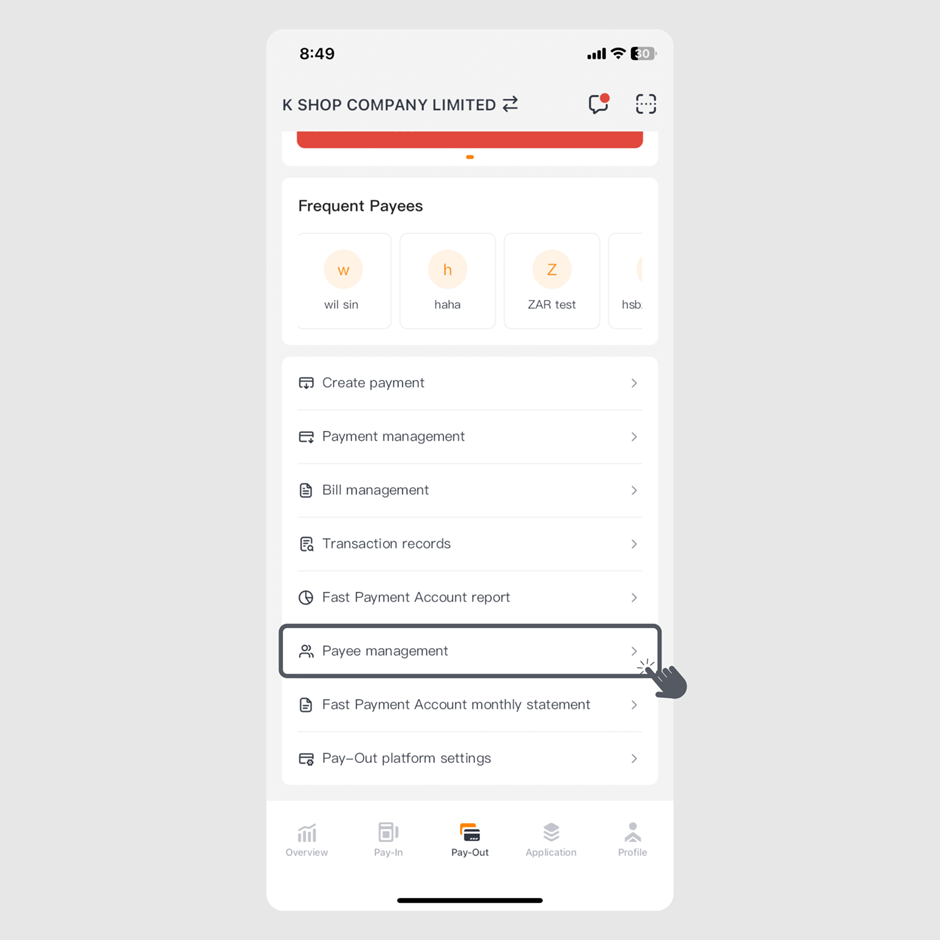
Step 1: Log in to the KPay App and click "Payee management" on the "Pay-Out" page.
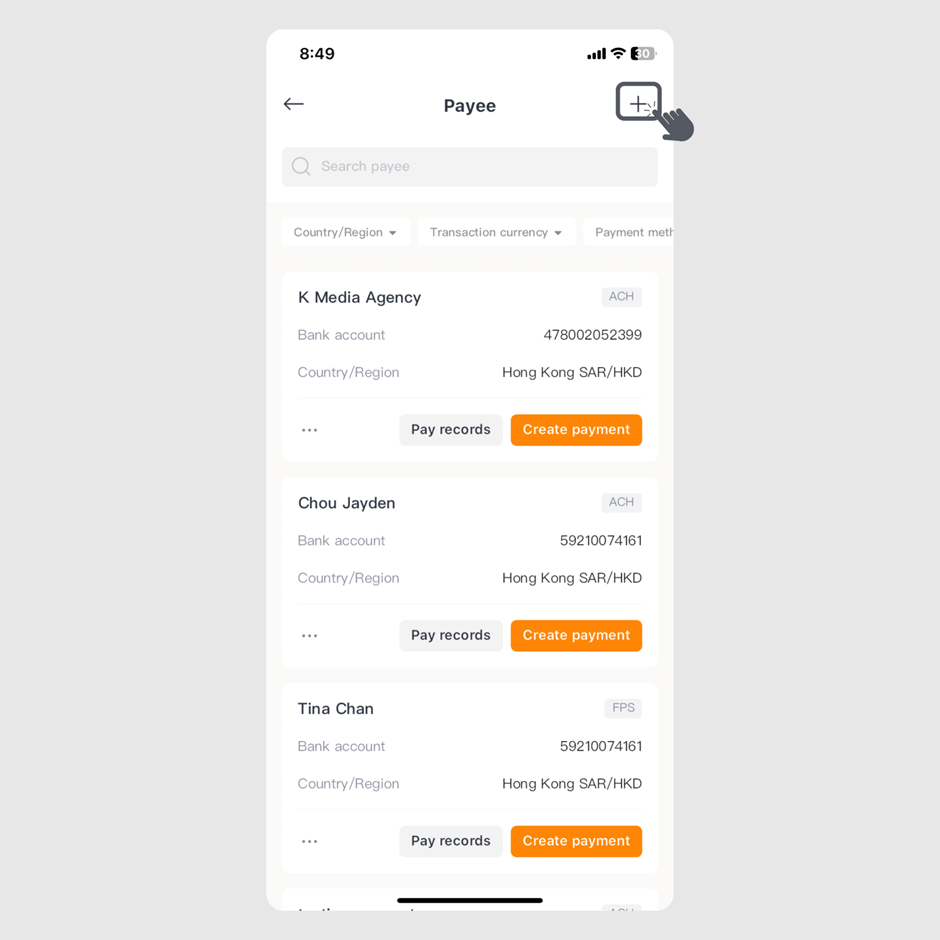
Step 2: Click the "+" icon in the top right corner.
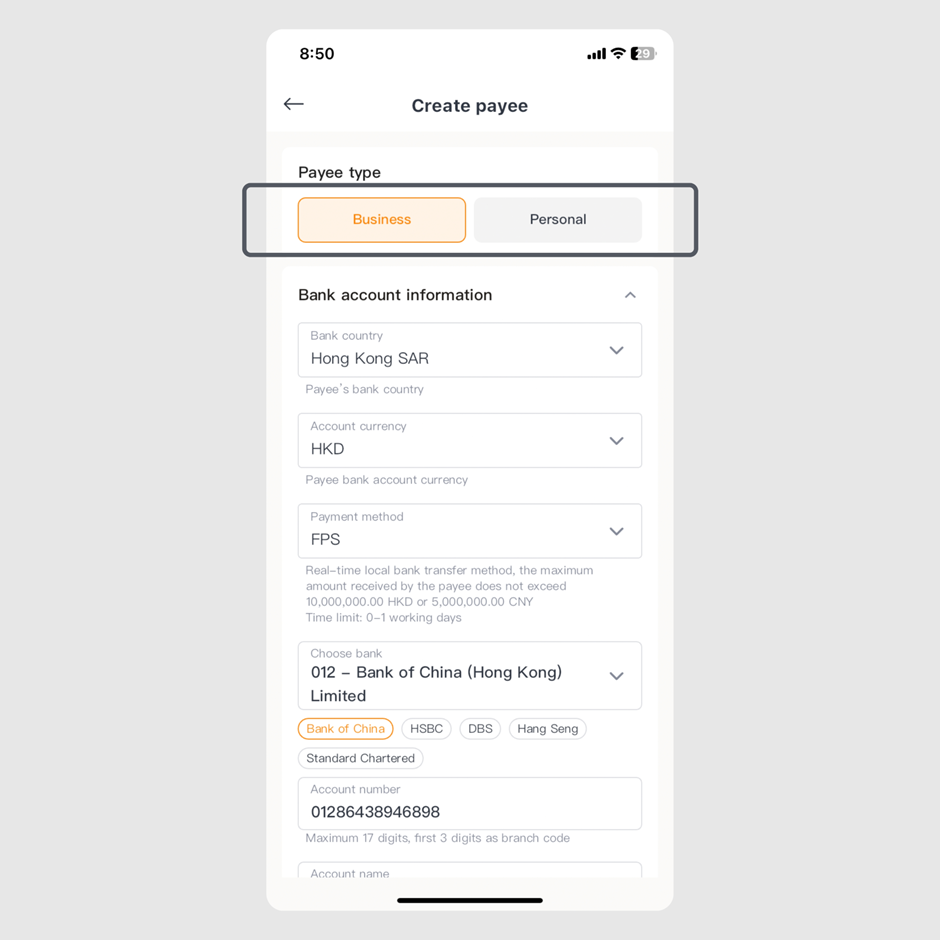

Step 4: Enter the required payee details and click "Create payee."
- Bank/country of the payee
| Supported countries/region | |||
|---|---|---|---|
| Australia | Mexico | South Africa | Malaysia |
| South Korea | Japan | Thailand | The Philippines |
| UAE | Hong Kong SAR | USA | |
| UK | New Zealand | Singapore | |
- Account currency type
| Type of account currency | ||||
|---|---|---|---|---|
| AUD | JPY | THB | PHP | EUR |
| HKD | KRW | MYR | AED | MXN |
| CNY | NZD | SGD | GBP | USD |
- Payment methods
| Supports local transfers and global remittances | |
|---|---|
| Local transfers | global remittances |
| FPS ACH RTGS SWIFT | SWIFT |
- Bank code and account number
- Account name
- "Business" or "Individual" name and country/region
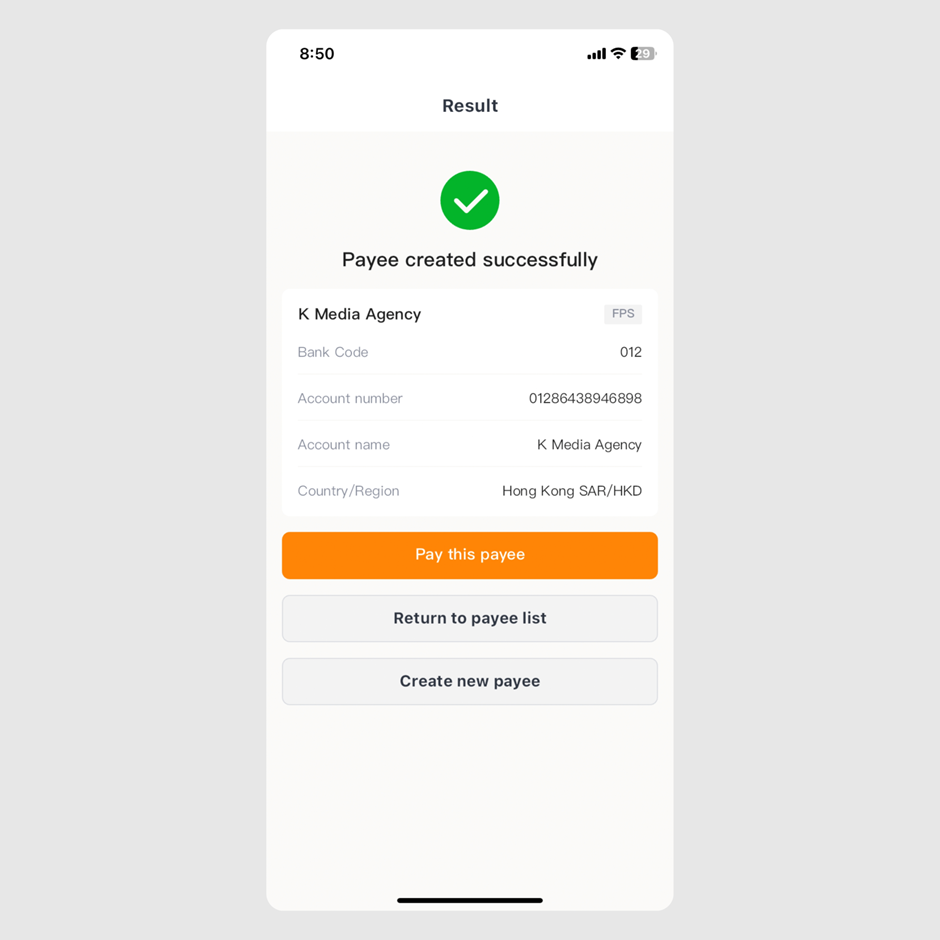
Step 5: Once the payee is created, you can choose "Pay this payee" to make a payment, "Create new payee" to add another, or "Return to payee list" to exit.
How to Edit or Delete a Payee?
Edit a payee

Step 1: Log in to the KPay App and click "Payee management" on the "Pay-Out" page.

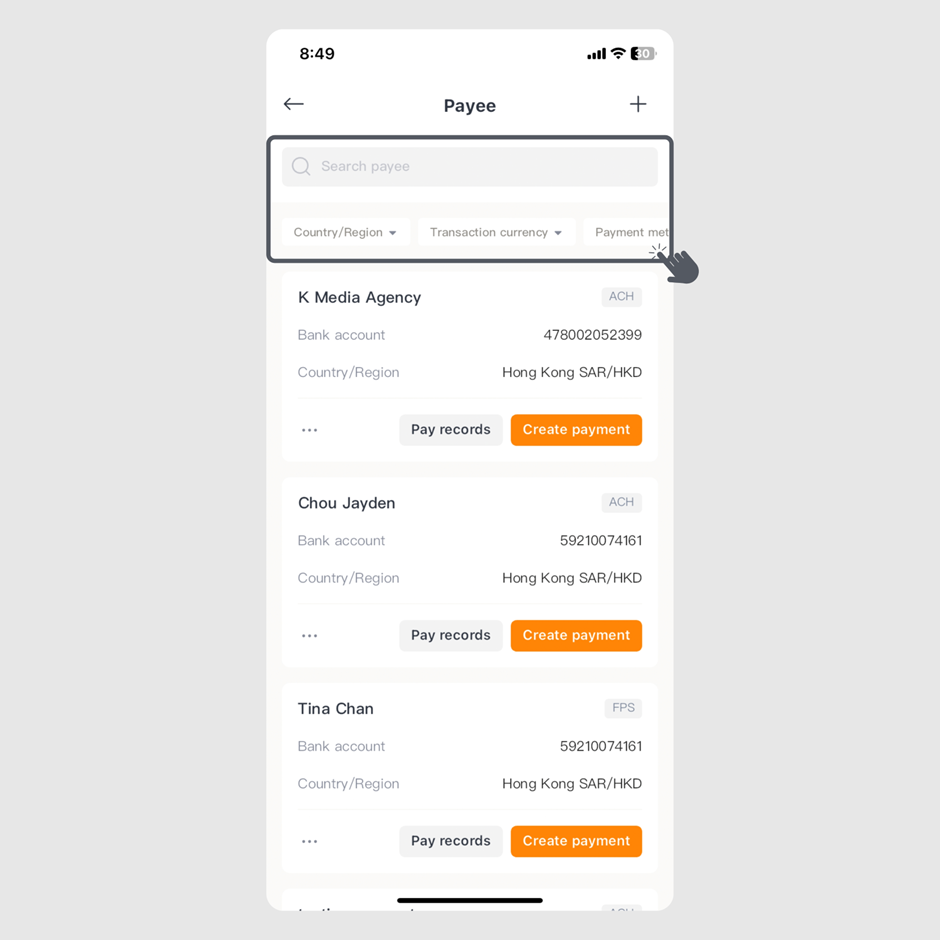
Step 2: Enter the payee's name in the search bar or scroll to select the payee card.

Step 3: Click the "..." icon on the bottom left of the payee card.
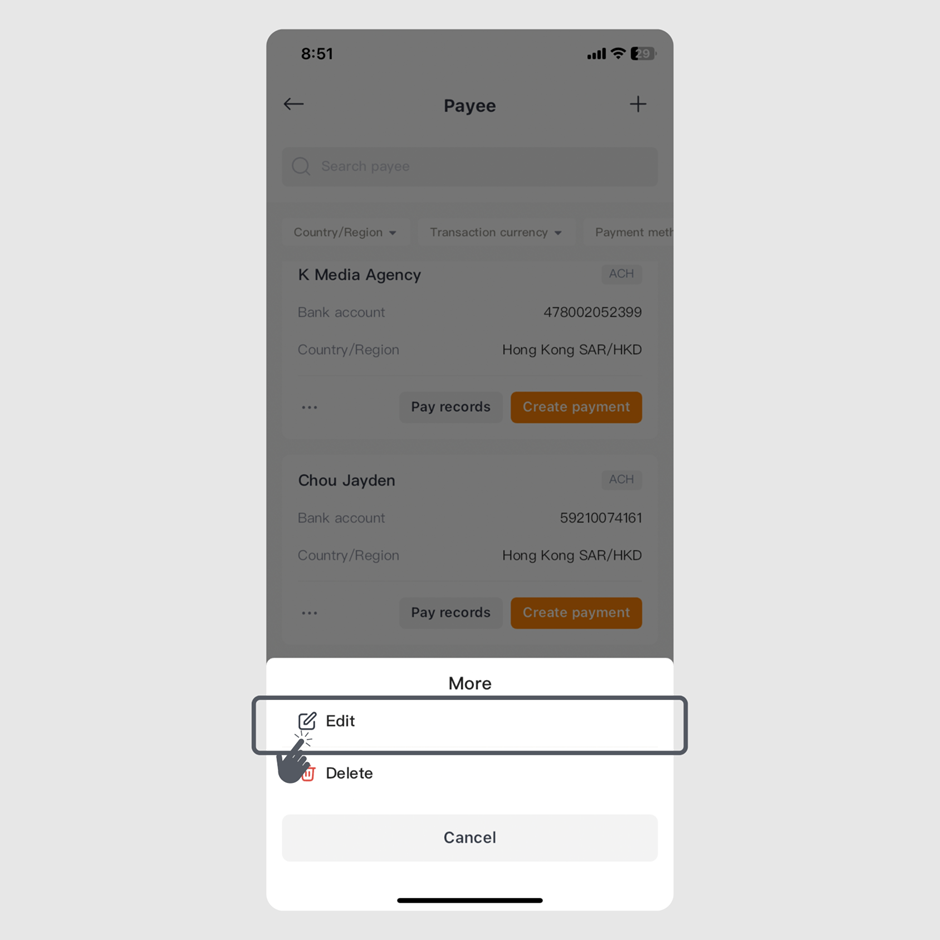
Step 4: Click "Edit".
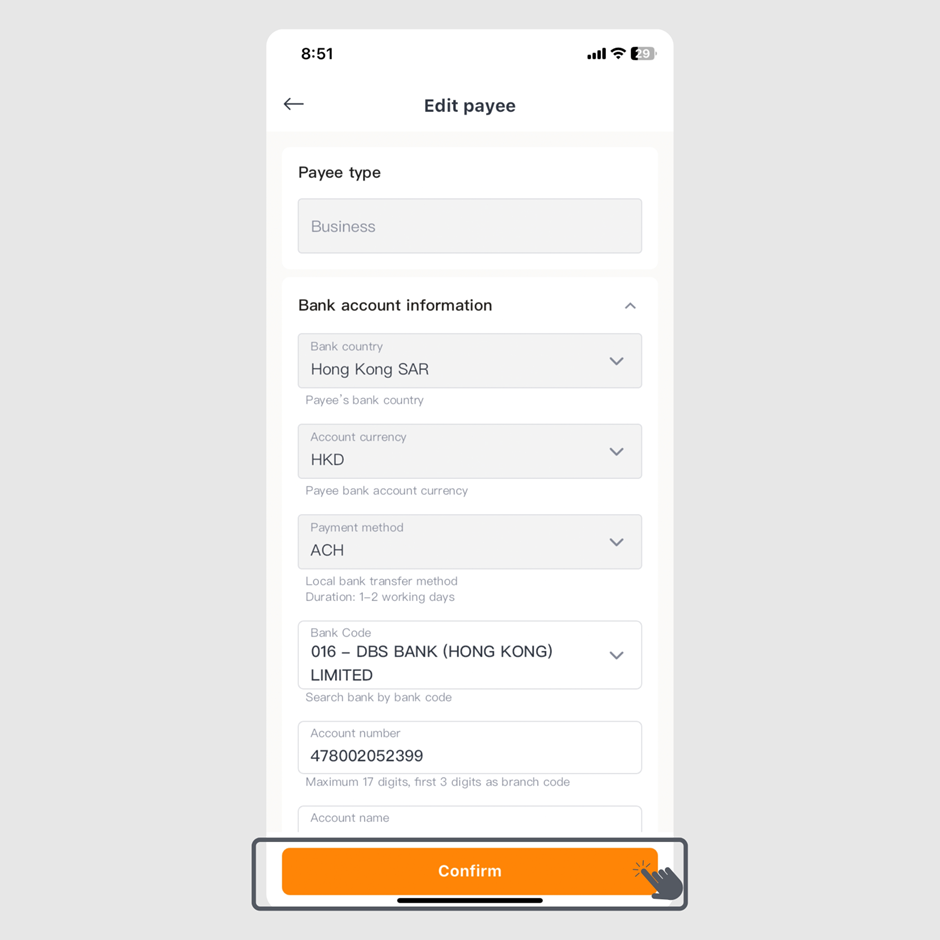
Step 5: Enter the changes and click "Confirm" to update.
Delete a payee

Step 1: Log in to the KPay App and click "Payee management" on the "Pay-Out" page.
Step 2: Enter the payee's name in the search bar or scroll to select the payee card.
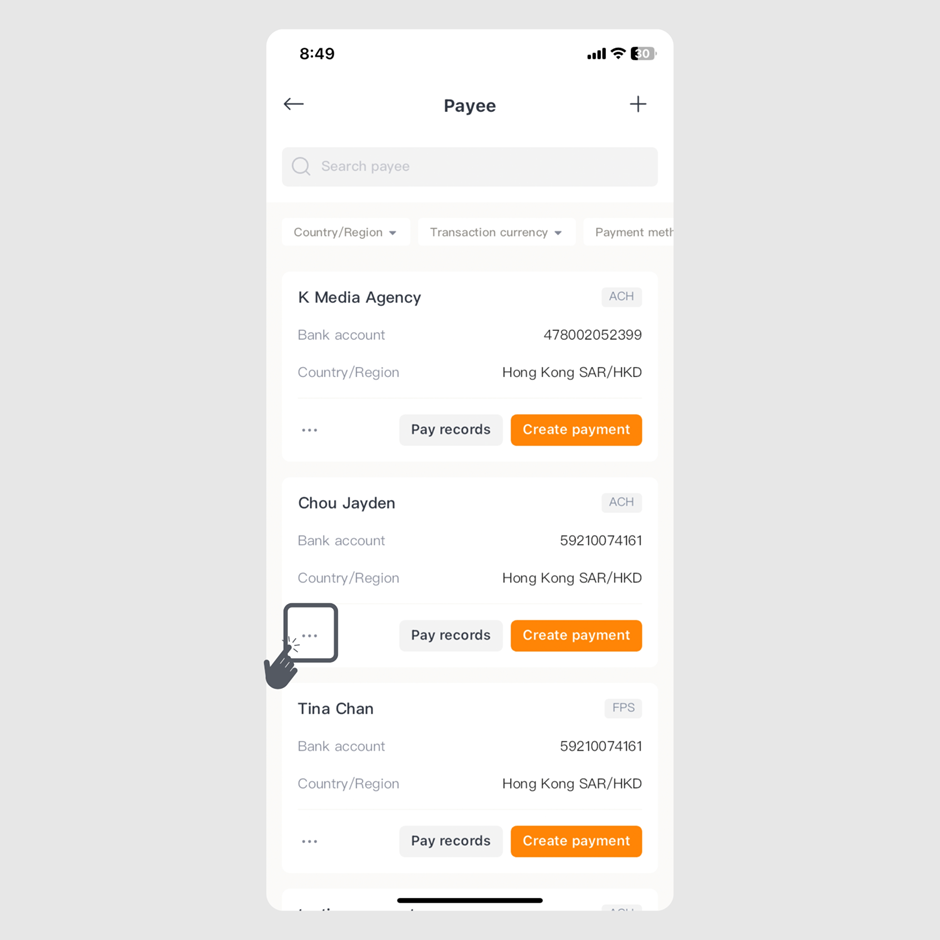
Step 3: Click the "..." icon on the bottom left of the payee card.
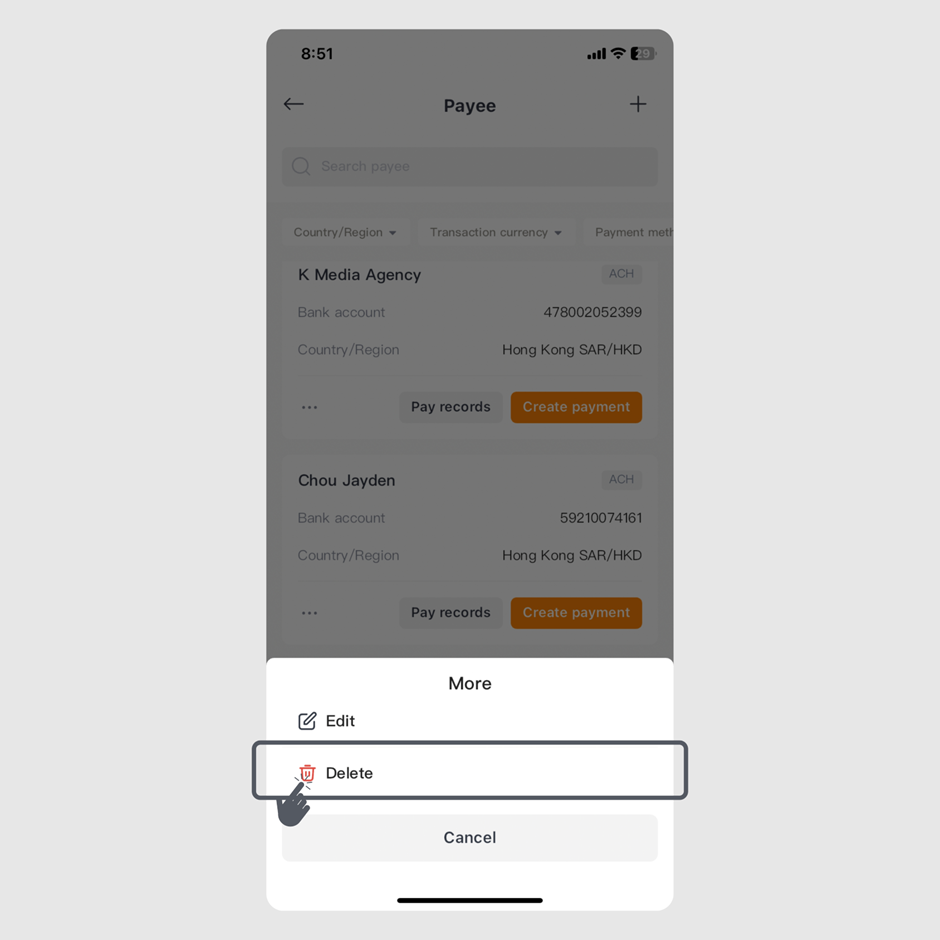
Step 4: Click "Delete" to remove the payee.
How to Search / View / Export the Transaction Records of Payees?

Step 1: Log in to the KPay App and click "Payee management" on the "Pay-Out" page.
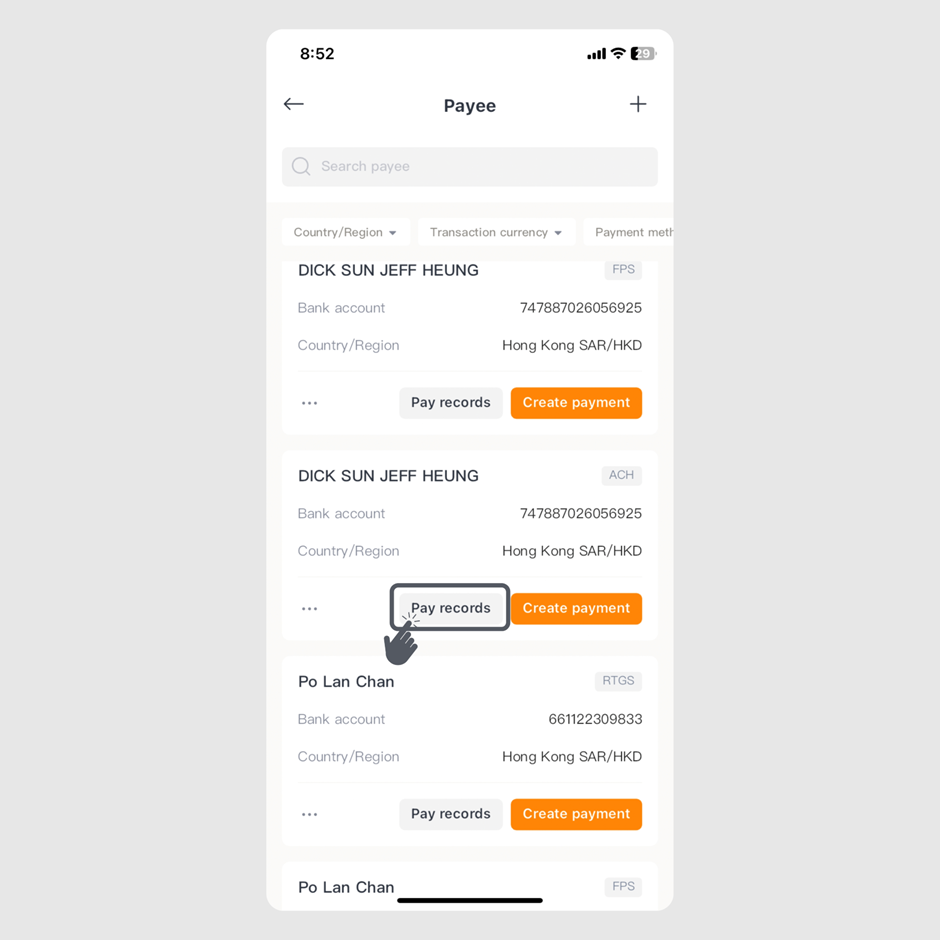
Step 2: Select the payee and click "Pay records" at the bottom right of the payee details.
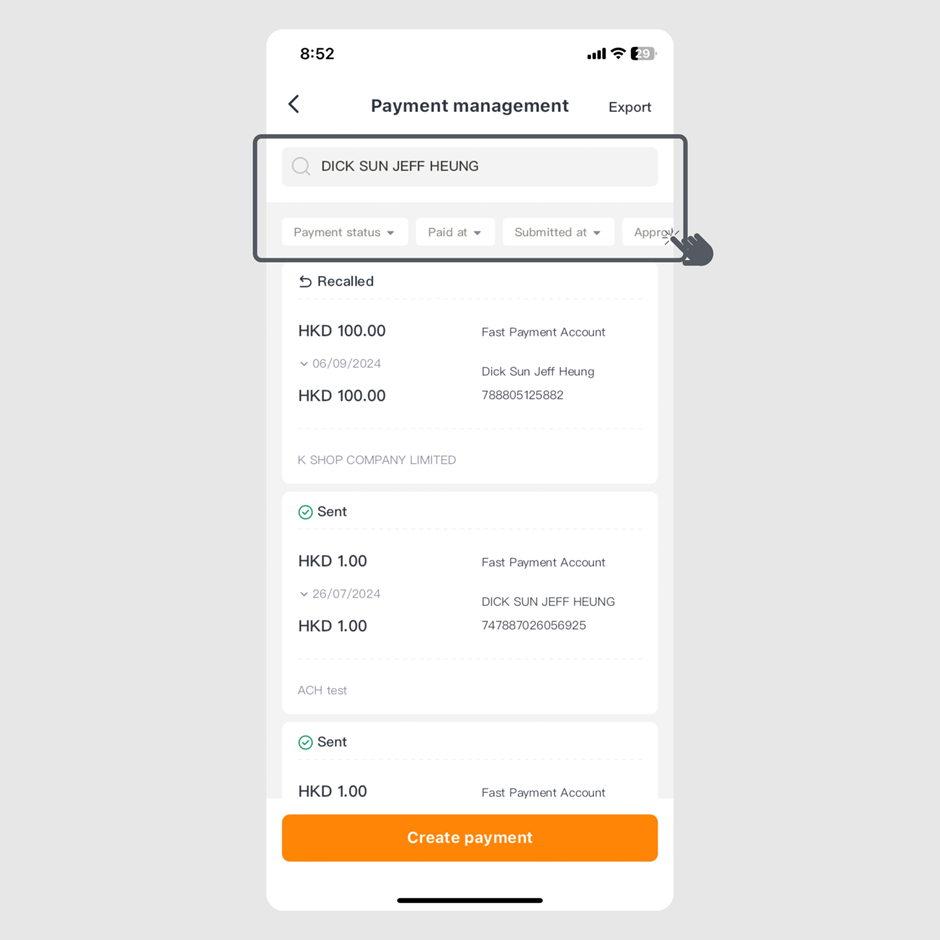
Step 3: To search specific records, filter by "Payment status," "Pay at," "Submitted at," "Approver," "Submitter," or “Payment Method.”
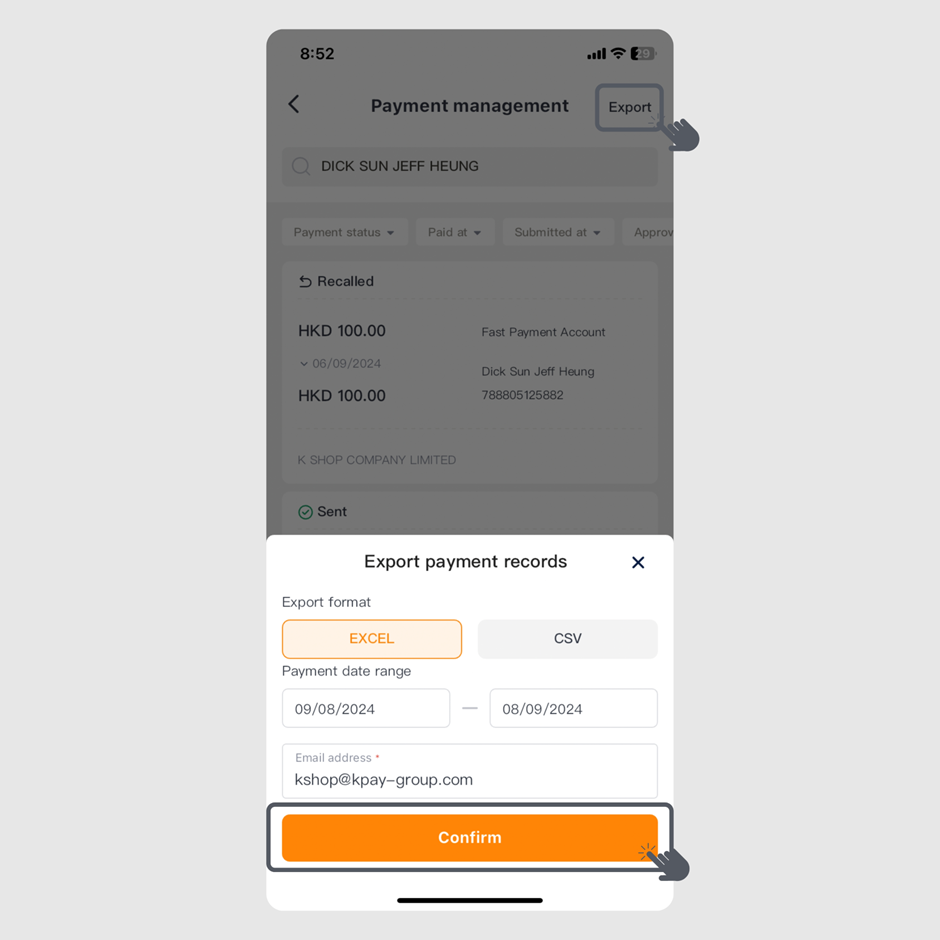
Step 4: Once you have the records, click "Export" in the top right, choose the format, payment date, and email address to send the records.
For any product-related inquiries, feel free to call our customer service team at 3706-7828 during office hours (Monday to Sunday, 10 AM - 10 PM). We are here to help!
